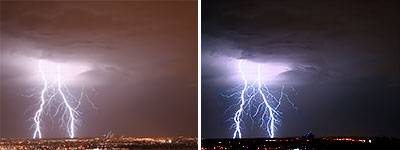
When you are taking photos of a lightning with a cheap digital camera photos tends to be noisy and over/under exposed because it is very hard to determine what the right settings of exposure and shutter are. So here is the simple way how to correct lightning photo from one that is bad exposed and noisy to one that is perfectly exposed and noise-free.
Photoshop itself has Noise reduction filters but often I don't get the right result with it. That is why I use Noise Ninja or Neat image for noise correction, particularly in these low light conditions.
Step 1
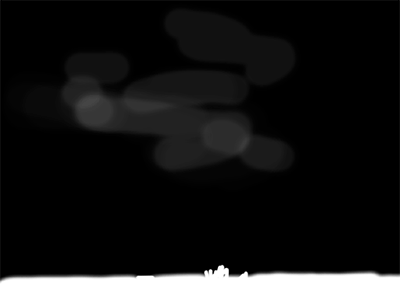
Open our lightning photo (you can download this one from here).
Step 2
Copy our "background" layer to a new one (press CTRL + J on the keyboard) and name this new layer "copy"
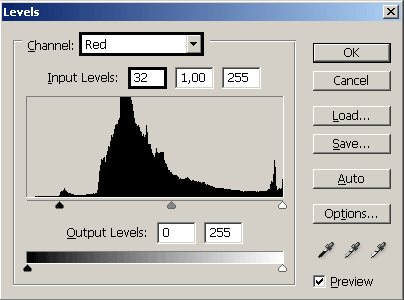
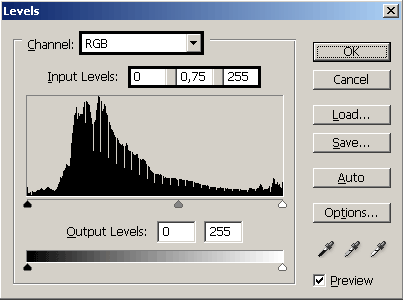
Step 3
Our photo is badly exposed so we have to adjust levels on the photo. So, go and click on the Create new adjustment layer and select Levels. Adjust values as I did on the picture below.
Step 4
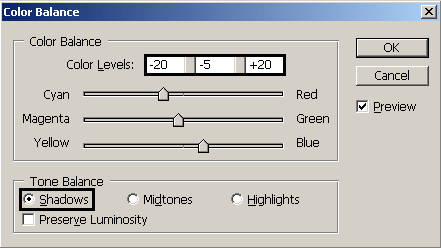
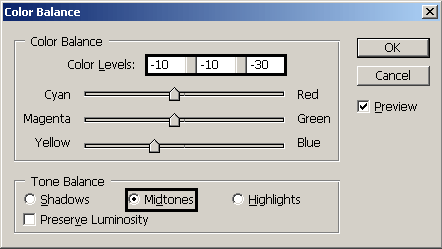
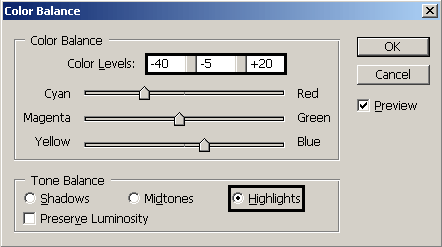
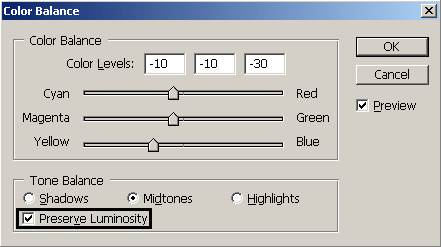
Now we have to make adjustments to colors on the photo so click on Create new adjustment layer, select Color balance and set values as I did.
Step 5
Lets concentrate on the lightning itself. We have to add more dramatic to scene. So copy this last layer (from previous step) using CTRL + J on keyboard or drag and drop this layer onto Create new layer from Layers palette. Now double click on this layer and only thing that you have to change is to turn ON Preserve transparency button.
Now you have to fill this layer's mask with black (two ways to do this; press D on keyboard and then CTRL + BACKSPACE or pick Paint bucket tool, select black as color and fill in the mask). Now pick Brush tool, zoom in on the lightning, select some medium size brush, set opacity to around 10-20% and start painting over the lightning several times. Concentrate on the point where lightning has left the cloud.
Step 6
Last thing that we have to correct on this photo is the town on the bottom of the photo. Easiest way to do this is by using Brightness/Contrast. So once again go and click Create new adjustment layer and select Brightness/Contrast, fill the mask with black. Now pick the brush tool, medium size brush, white color and paint over the town. You can work on the clouds but remember to lower the opacity of the brush. I used very small opacity, 5%. This is how the mask looks like when I finished working on it.
Step 7
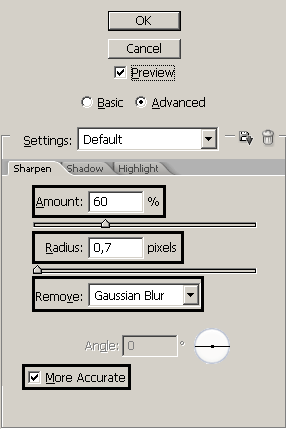
Merge all layers and apply Sharpen filter, FILTER - SHARPEN - SMART SHARPEN and set these values
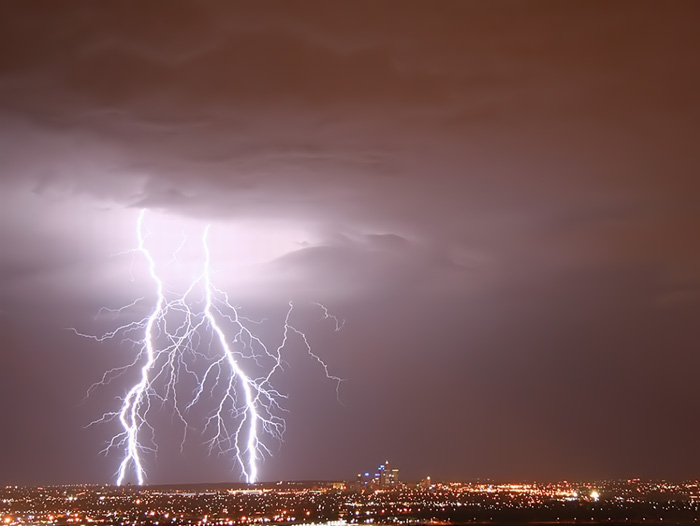
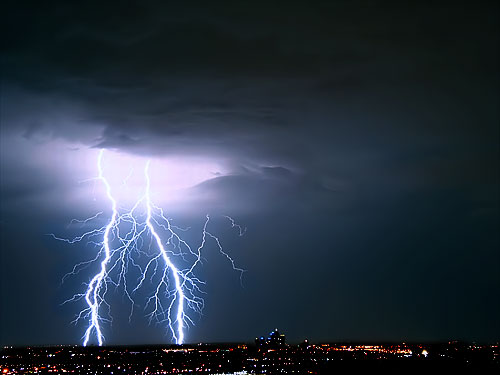
And the final image looks like this
No comments:
Post a Comment